The Selected Orders Sidebar helps you manage multiple orders simultaneously, allowing you to control which orders receive products as you shop and providing condensed, real-time preview into your orders in your order group, reducing the cognitive load and chance for human errors as you’re keying large orders in.
How It Works
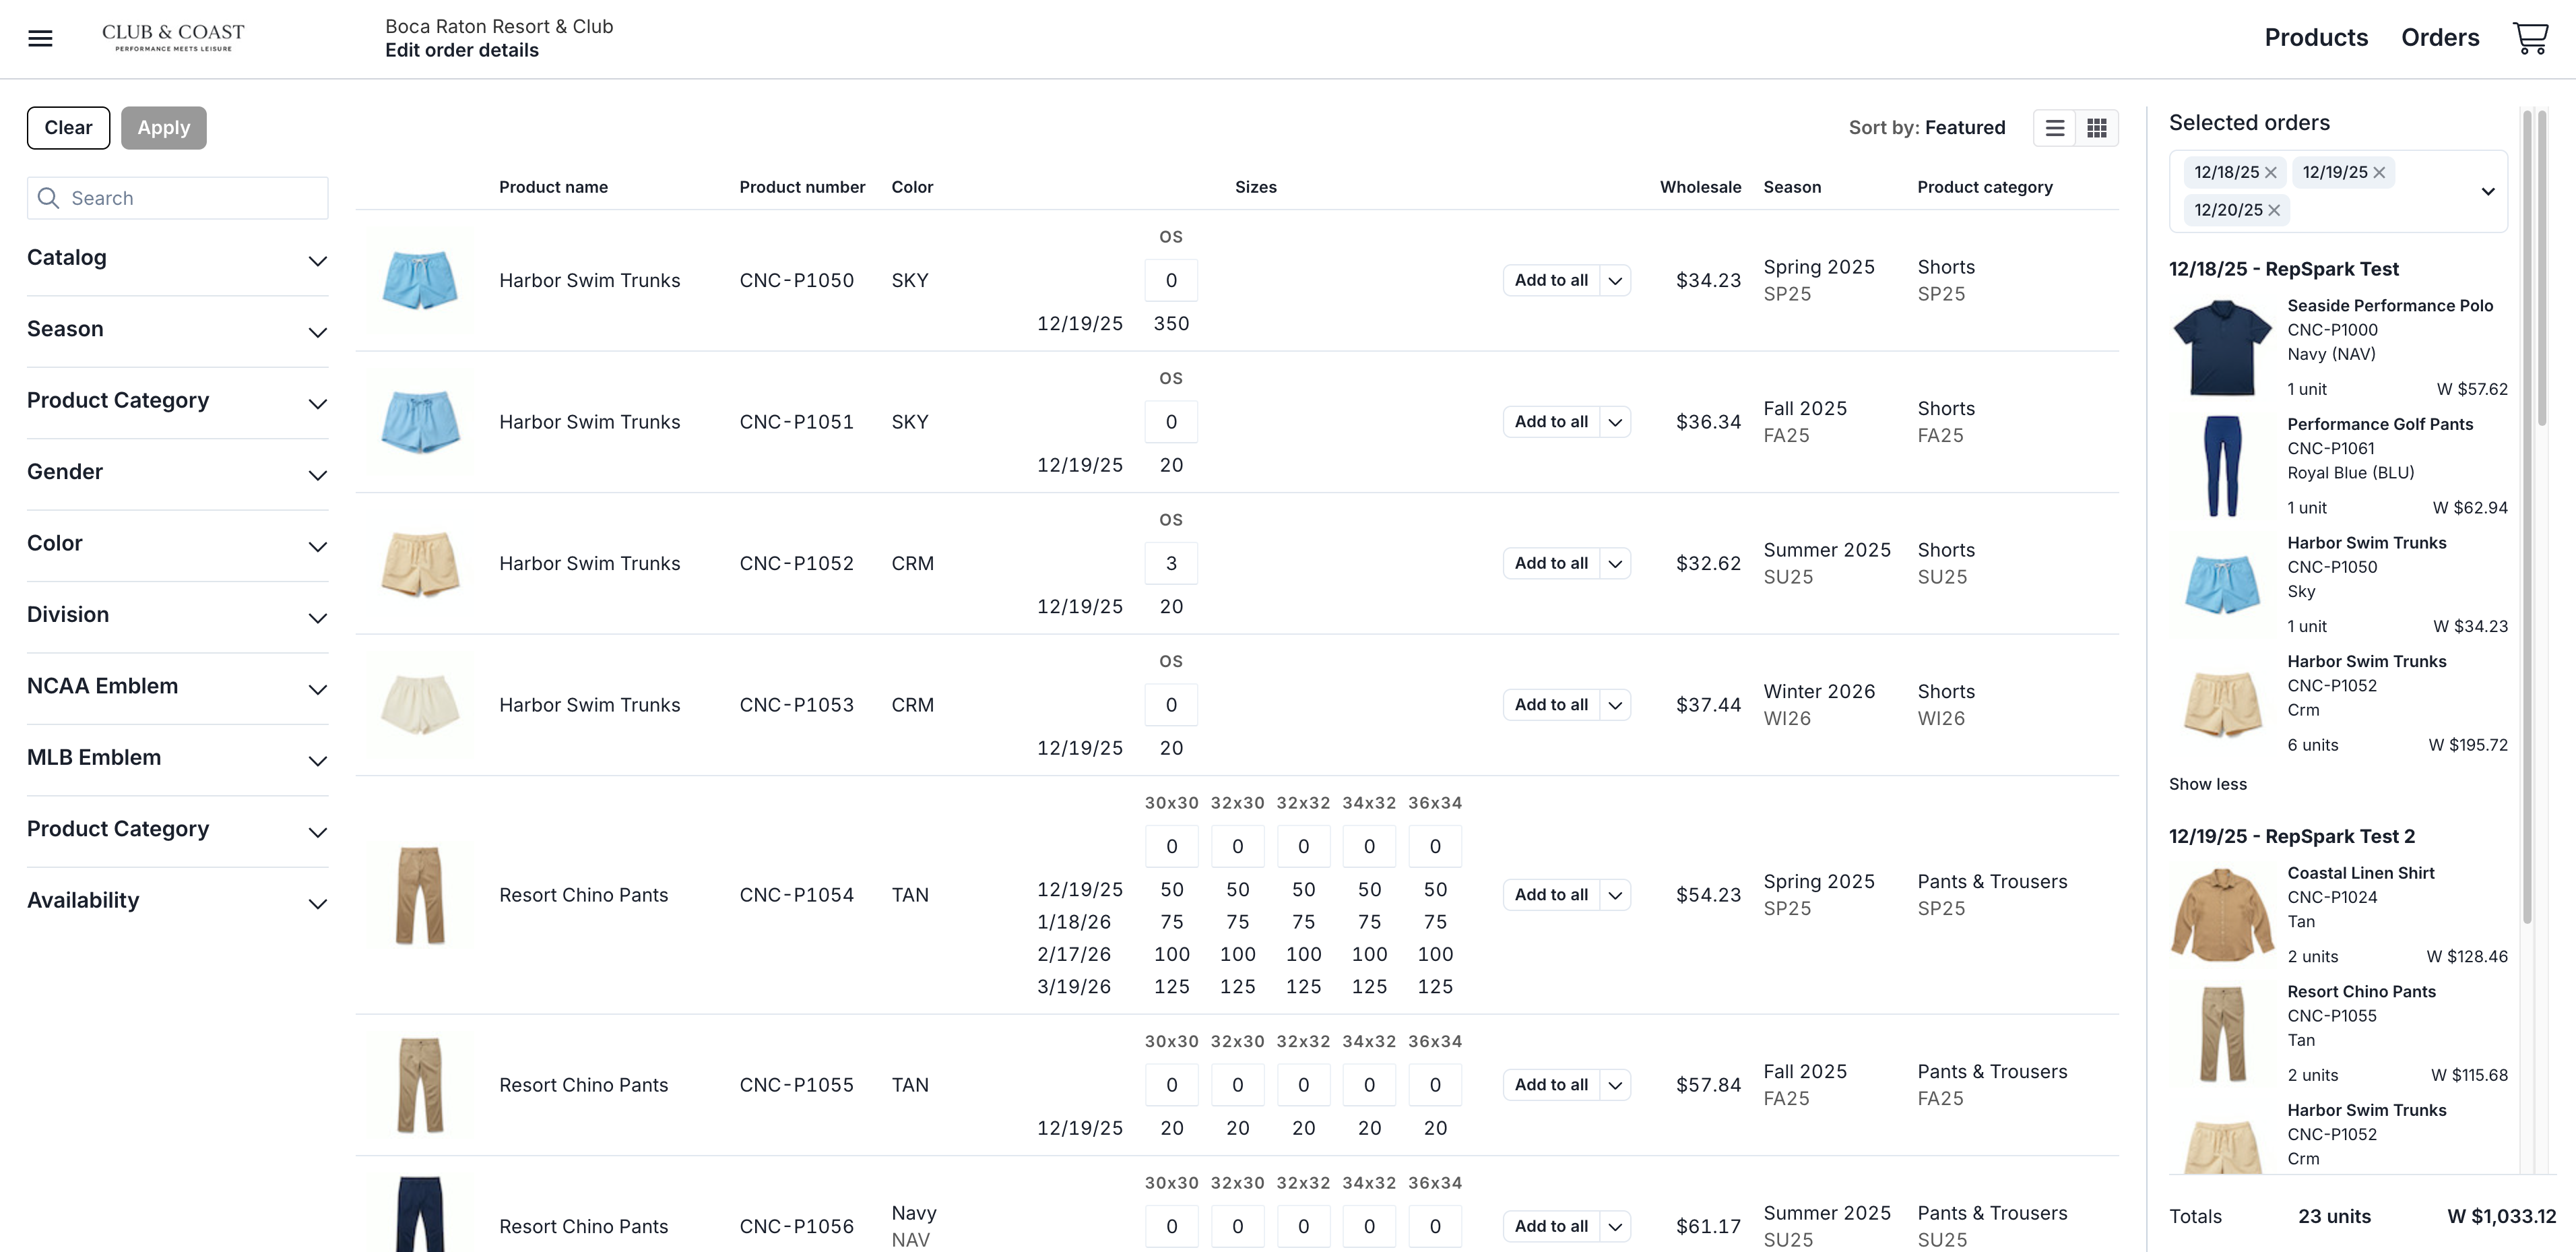
When you have multiple orders in an order group, the Selected Orders Sidebar appears on the left side of the products page and the product details page. This sidebar acts as your control panel for managing which orders are active while adding products, displaying key information about each order, and enabling quick navigation between different delivery dates.
Before You Start
Make sure you have:
-
Started an order or order group
-
Enabled RepSpark Flow interface (New UI checkbox)
Steps
Step 1 - Select your selected orders

Choose your selected orders by clicking the dropdown in the sidebar, and selecting the orders that you want to begin working through. The sidebar appears on the right side of the products page and includes:
-
Dropdown selector showing currently selected orders with X icons for quick removal
-
Expand/collapse arrow to show or hide the full order list
-
Selected orders appear in the top bar and have checked boxes
Note: If you created all of your orders in the order header prior to adding products, all orders will be selected by default. If you started adding products to some orders, then added a new order to your order group, that new order will not be selected by default.
Step 2 - Add products to your selected orders
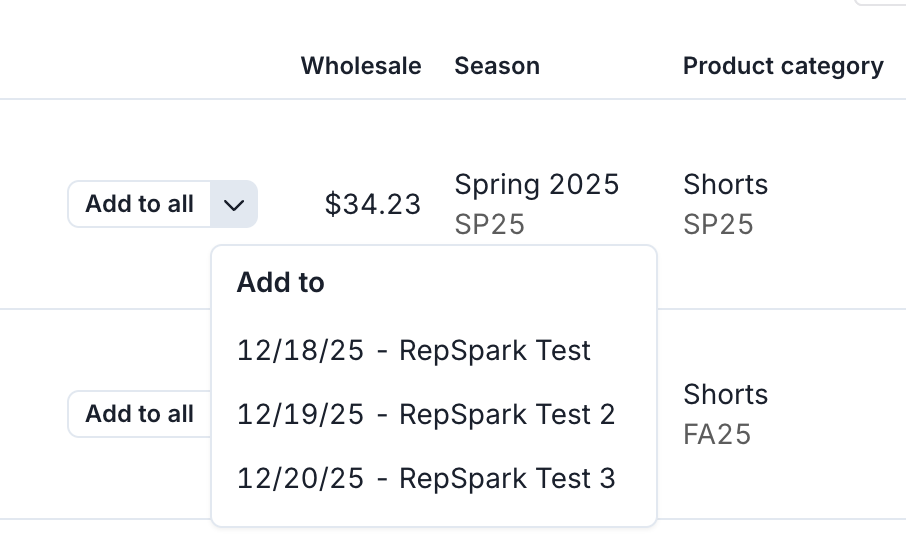
Once you’ve chosen your selected orders, start adding products to those orders on the products pages. You can add to selected, or click the arrow to add to all, or an individual order.
Step 3 - Individual Order Details
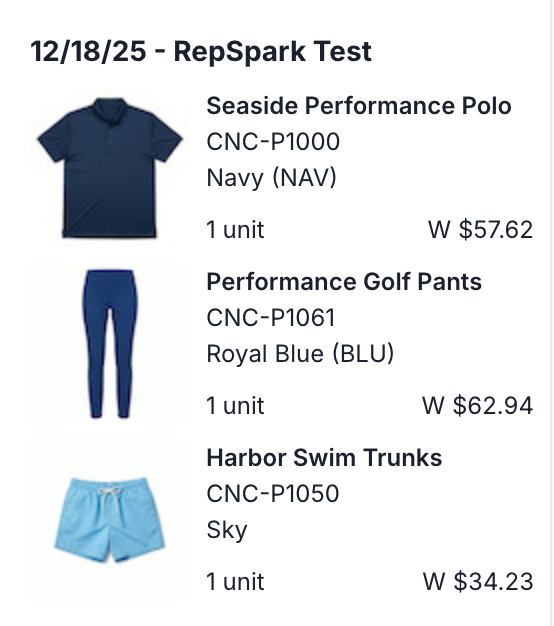
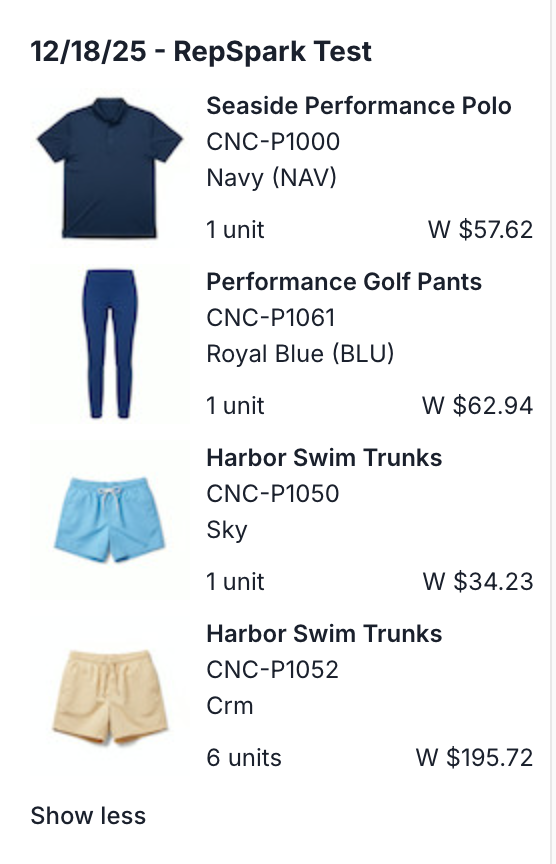
After you add products to your orders, in the selected orders sidebar, you’ll see a quick preview of the line items in each of your orders. We’ll show up to 3 by default, and you can click “Show 1 more product” to show the rest of the line items in that order. Click “Show less” to collapse again.
Step 4 - Review your order totals

The sidebar will show your running total units and amounts of the orders that are selected at the bottom. This will update as you keep adding or removing items to your cart.
Tips and Best Practices
Efficient Multi-Date Ordering:
-
Start with products common to all dates (select all orders)
-
Then work on date-specific items (select individual orders)
-
Review in the Summary view to see totals by category
Avoiding Common Mistakes:
-
Always verify which orders are selected before adding high-quantity items
-
Remember new orders added to existing order groups start unselected