- Help Center
- Software Updates
- Branded Landing Page
-
Getting started
-
Integrations
-
PGA x Accelerate
-
API
-
Assortments & Catalogs
- Creating Order From Favorites- Using the Multi Delivery Board
- Digital Catalog Editor-Creating Your Digital Catalog
- How to Create an Assortment
- Adding a Canvas Page
- Linking a Showroom or Technical Video to a Feature Page
- Creating an Assortment with Embroidery
- Video Demo of Virtual Showroom
- Favorites List Workflow
- Multidate Orders using the Digital Catalog Enhancement
- Ordering From the Digital Catalog
- New Wish List Features
- Setting Permissions
- Browsing and Marking Up the Digital Catalog- Creating and Shopping a Favorites List
- Creating a Line Sheet
- Wish List Tutorial
- Wish List Cover Images
- New Assortments Tab
- FAQ's
- Catalog- Single Page Mode for Smaller Form Factors
-
Wholesale Order Entry
-
Accelerate
- RepSpark Go App
- Exporting My Orders
- Admin Dashboard
- Setting Up and Managing My Users
- Filling In and Uploading the Excel Sheets
- Filters and Sorting Products
- Getting Started
- Creating My Digital Catalog
- Adding My Images
- Reporting
- Exporting ATS to Excel
- Branding My Site
- Insignia Lite in Accelerate
- FAQ's- Really, FAQ's
-
Microsites
-
Admin
-
Data Management
-
B2B Users
-
Marketing
-
Reporting & Analytics
-
Software Updates
-
Internal
-
Community
-
RepSpark Pay
Managing Your Branded Hompages
Once many homepages have been created, you can manage them from the Branded Landing Page Summary screen.
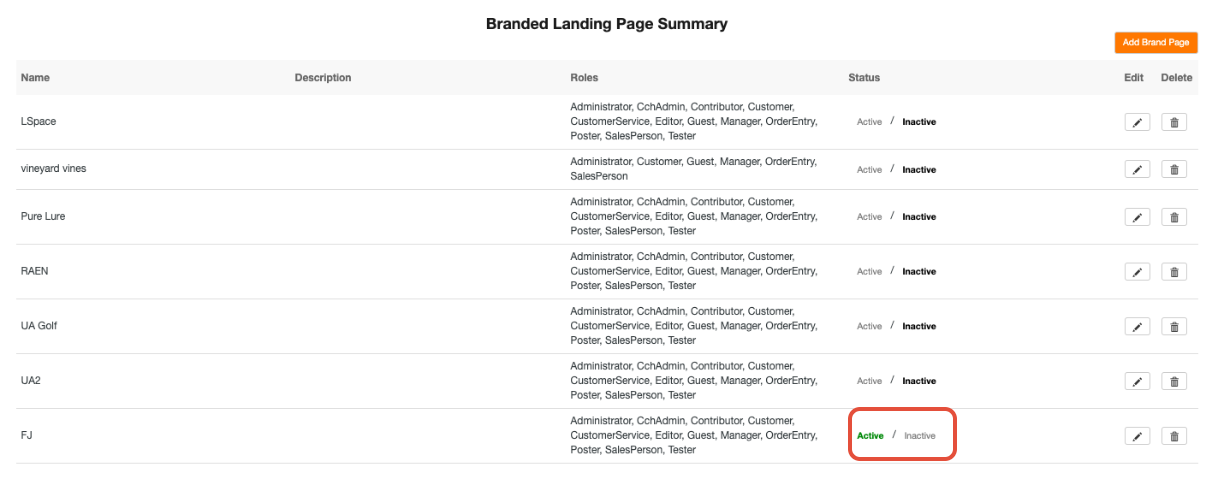
The active page will be noted with a green Active status as shown above. Please note, multiple pages can be active at the same time but only one page can be active per role. This means you cannot have 2 active homepages for role= customer. To change the status simply click on active or inactive right within this page.
To add a new page, click add brand page.
To edit an existing page, click the edit icon next to the page. This will open the page for editing.
To delete a page, click on the delete icon next to the page.