- Help Center
- Accelerate
- Getting Started
-
Getting started
-
Integrations
-
PGA x Accelerate
-
API
-
Assortments & Catalogs
- Creating Order From Favorites- Using the Multi Delivery Board
- Digital Catalog Editor-Creating Your Digital Catalog
- How to Create an Assortment
- Adding a Canvas Page
- Linking a Showroom or Technical Video to a Feature Page
- Creating an Assortment with Embroidery
- Video Demo of Virtual Showroom
- Favorites List Workflow
- Multidate Orders using the Digital Catalog Enhancement
- Ordering From the Digital Catalog
- New Wish List Features
- Setting Permissions
- Browsing and Marking Up the Digital Catalog- Creating and Shopping a Favorites List
- Creating a Line Sheet
- Wish List Tutorial
- Wish List Cover Images
- New Assortments Tab
- FAQ's
- Catalog- Single Page Mode for Smaller Form Factors
-
Wholesale Order Entry
-
Accelerate
- RepSpark Go App
- Exporting My Orders
- Admin Dashboard
- Setting Up and Managing My Users
- Filling In and Uploading the Excel Sheets
- Filters and Sorting Products
- Getting Started
- Creating My Digital Catalog
- Adding My Images
- Reporting
- Exporting ATS to Excel
- Branding My Site
- Insignia Lite in Accelerate
- FAQ's- Really, FAQ's
-
Microsites
-
Admin
-
Data Management
-
B2B Users
-
Marketing
-
Reporting & Analytics
-
Software Updates
-
Internal
-
Community
-
RepSpark Pay
Adding Future Inventory to Accelerate
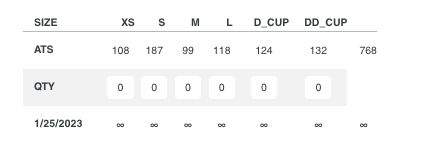
To add a future inventory line to Accelerate, you will start with tagging your products in Shopify. Shopify has some limitations to how you can display future inventory- It will be a single line per product with a future date and infinite inventory.
Watch this video on how to tag the products in Shopify.
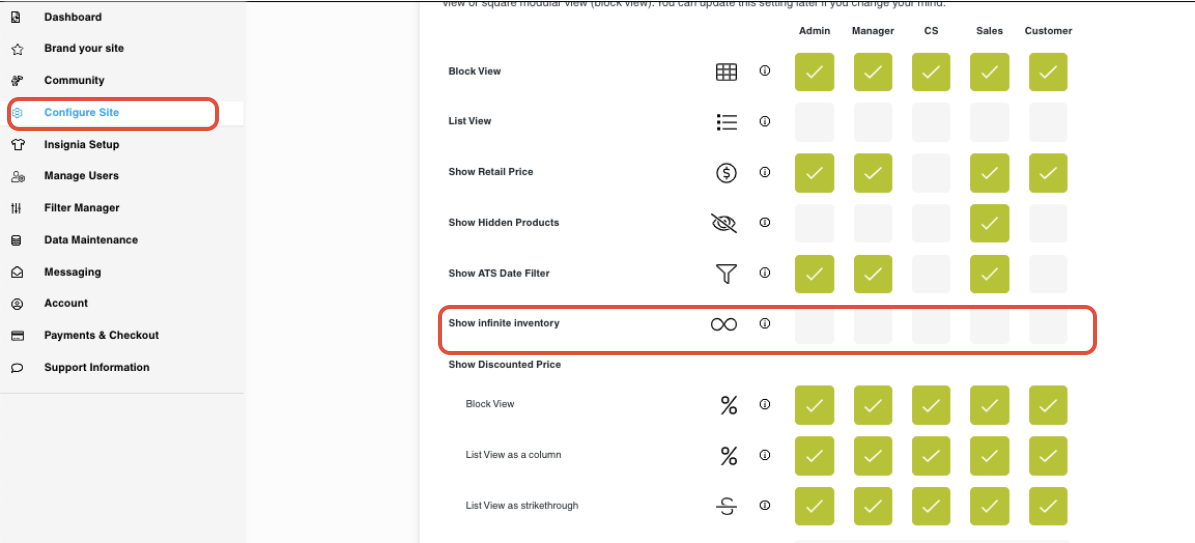
From there, you can move to the admin panel, go to configure site and check what roles should see the future inventory.