- Help Center
- Community
- Setting Up
-
Getting started
-
Integrations
-
PGA x Accelerate
-
API
-
Assortments & Catalogs
- Creating Order From Favorites- Using the Multi Delivery Board
- Digital Catalog Editor-Creating Your Digital Catalog
- How to Create an Assortment
- Adding a Canvas Page
- Linking a Showroom or Technical Video to a Feature Page
- Creating an Assortment with Embroidery
- Video Demo of Virtual Showroom
- Favorites List Workflow
- Multidate Orders using the Digital Catalog Enhancement
- Ordering From the Digital Catalog
- New Wish List Features
- Setting Permissions
- Browsing and Marking Up the Digital Catalog- Creating and Shopping a Favorites List
- Creating a Line Sheet
- Wish List Tutorial
- Wish List Cover Images
- New Assortments Tab
- FAQ's
- Catalog- Single Page Mode for Smaller Form Factors
-
Wholesale Order Entry
-
Accelerate
- RepSpark Go App
- Exporting My Orders
- Admin Dashboard
- Setting Up and Managing My Users
- Filling In and Uploading the Excel Sheets
- Filters and Sorting Products
- Getting Started
- Creating My Digital Catalog
- Adding My Images
- Reporting
- Exporting ATS to Excel
- Branding My Site
- Insignia Lite in Accelerate
- FAQ's- Really, FAQ's
-
Microsites
-
Admin
-
Data Management
-
B2B Users
-
Marketing
-
Reporting & Analytics
-
Software Updates
-
Internal
-
Community
-
RepSpark Pay
How to configure your user notification preferences
This guide provides a step by step guide for users to configure their notification preferences for their individual user.
Before you start
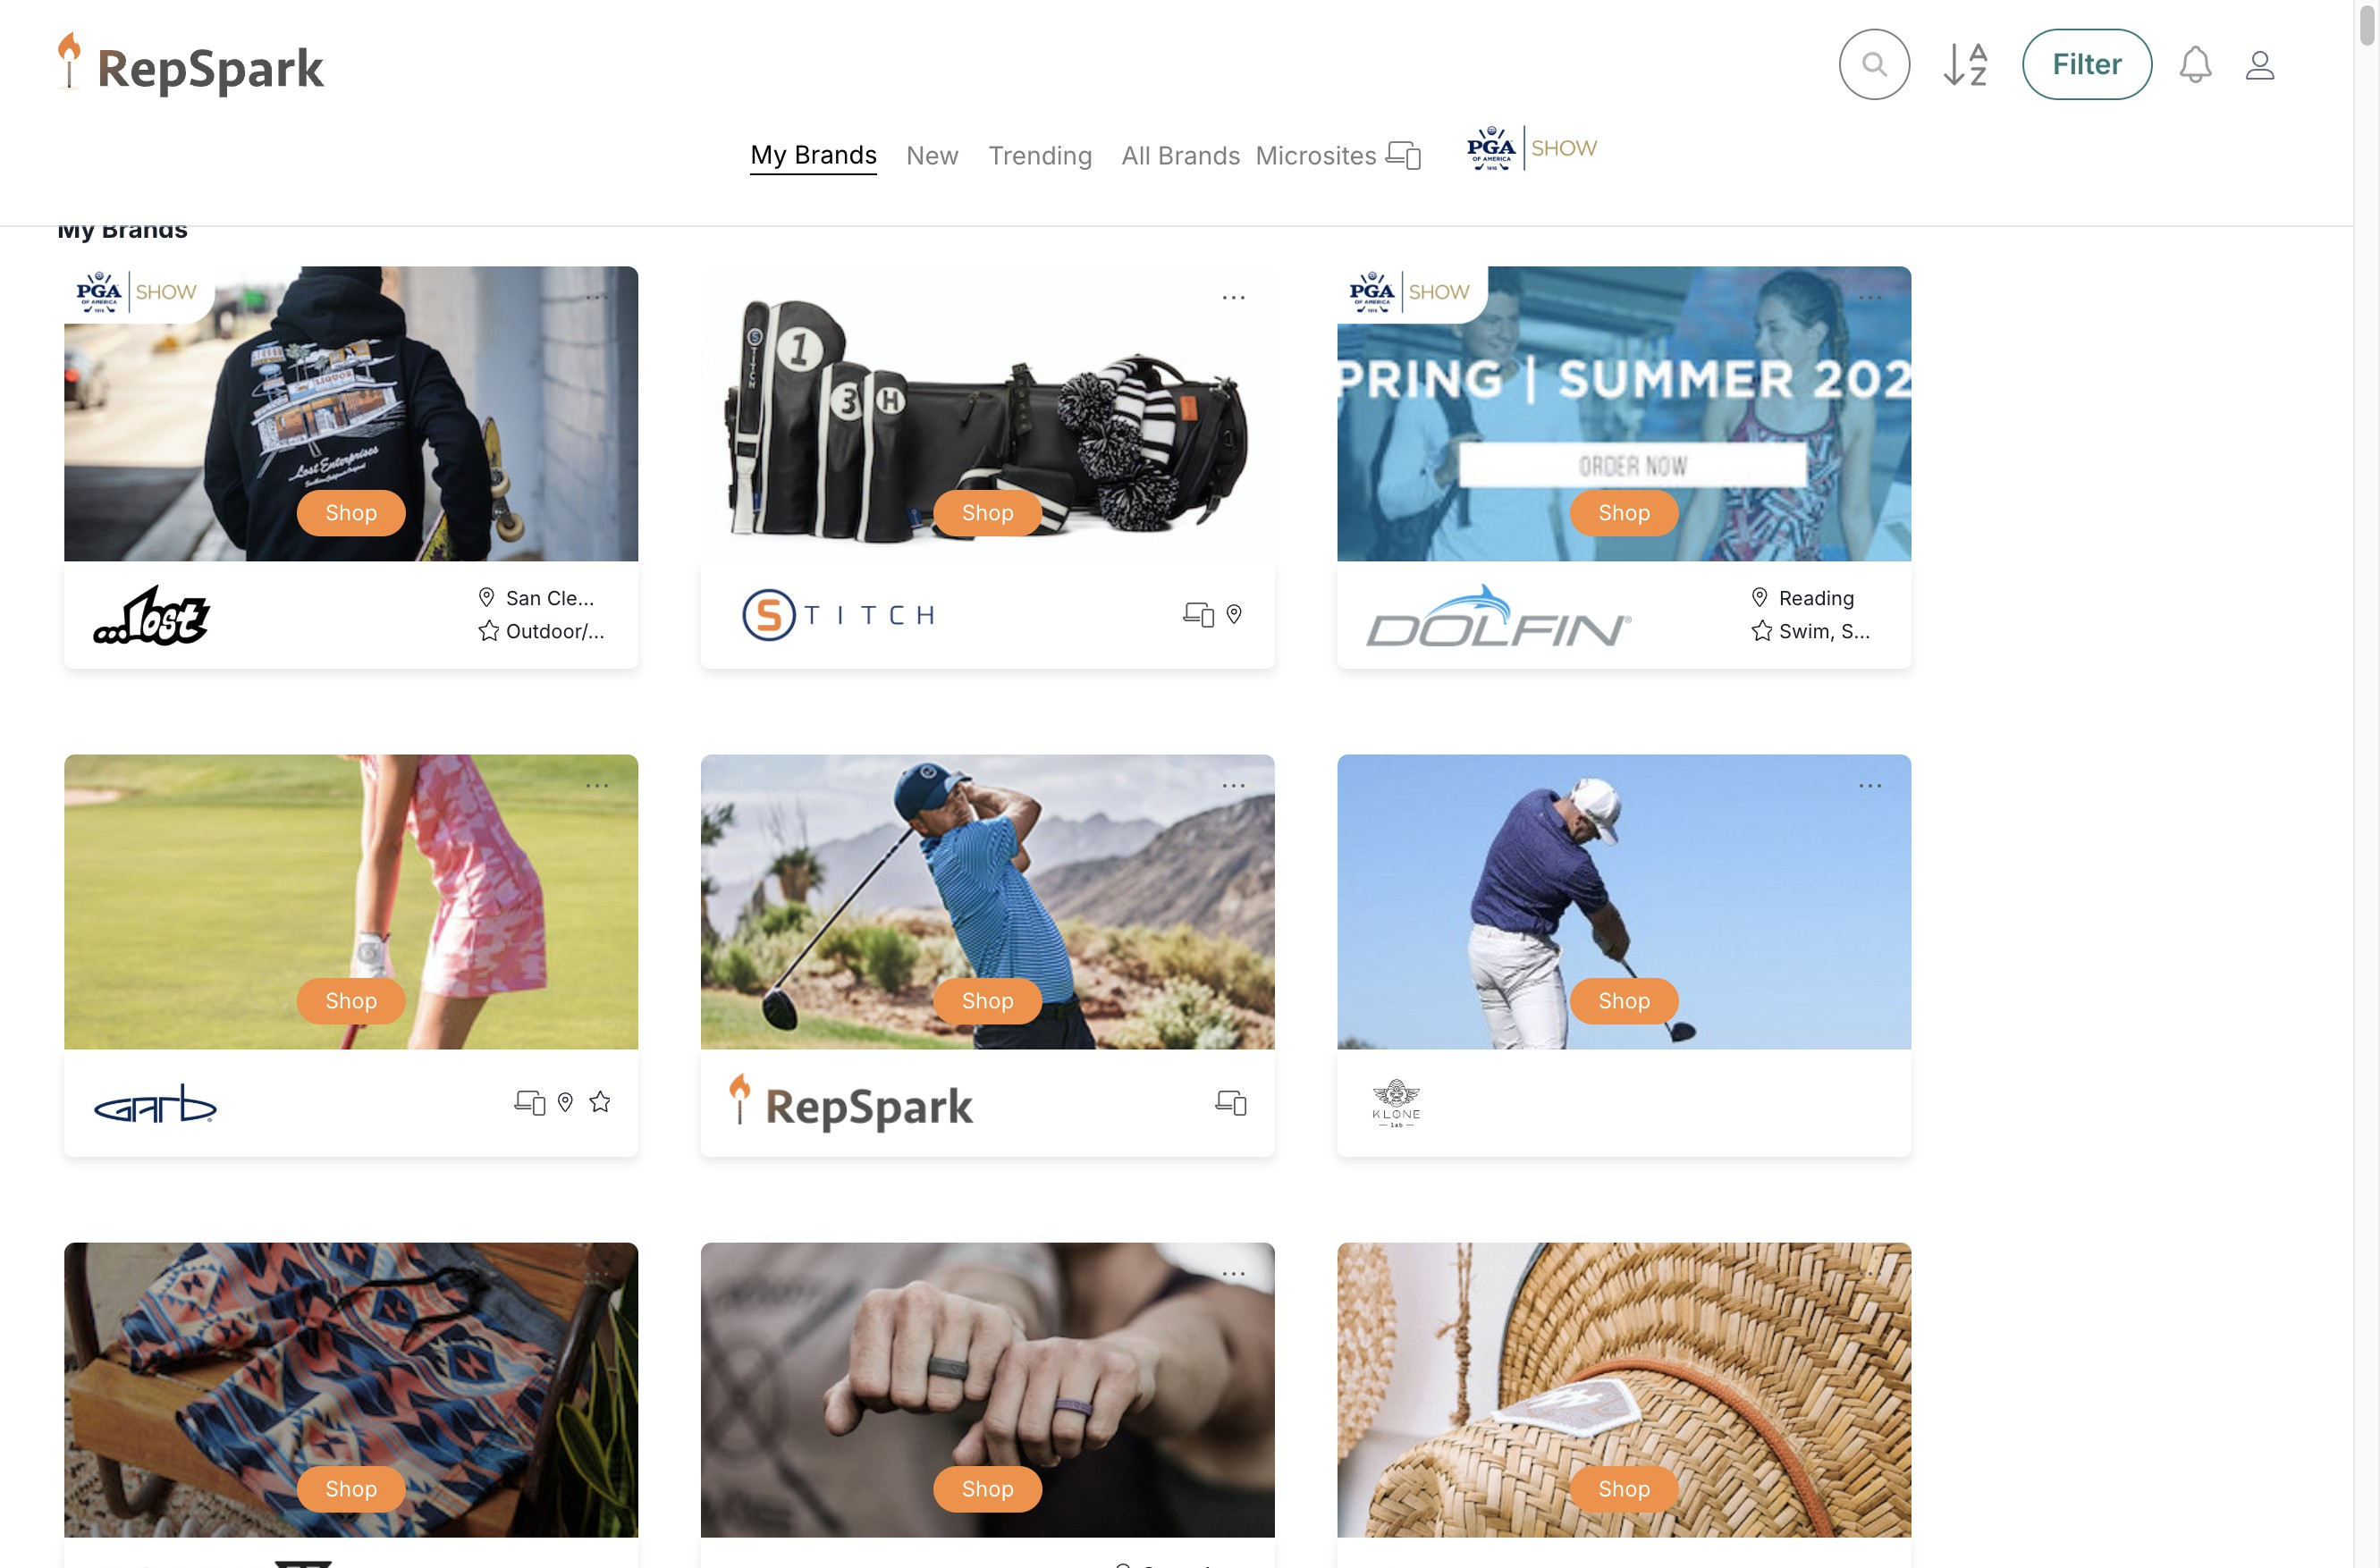
On RepSpark, users are able to configure their notification preferences for their individual user. They can choose which notifications they want to receive, and which channel - email, or in-app. The notifications that are available to customize depend on the user’s roles and which brands you have access to, so don’t be alarmed if you might see different notifications as a sales representative versus a customer.
Steps
Step 1 - Open the Account Settings page
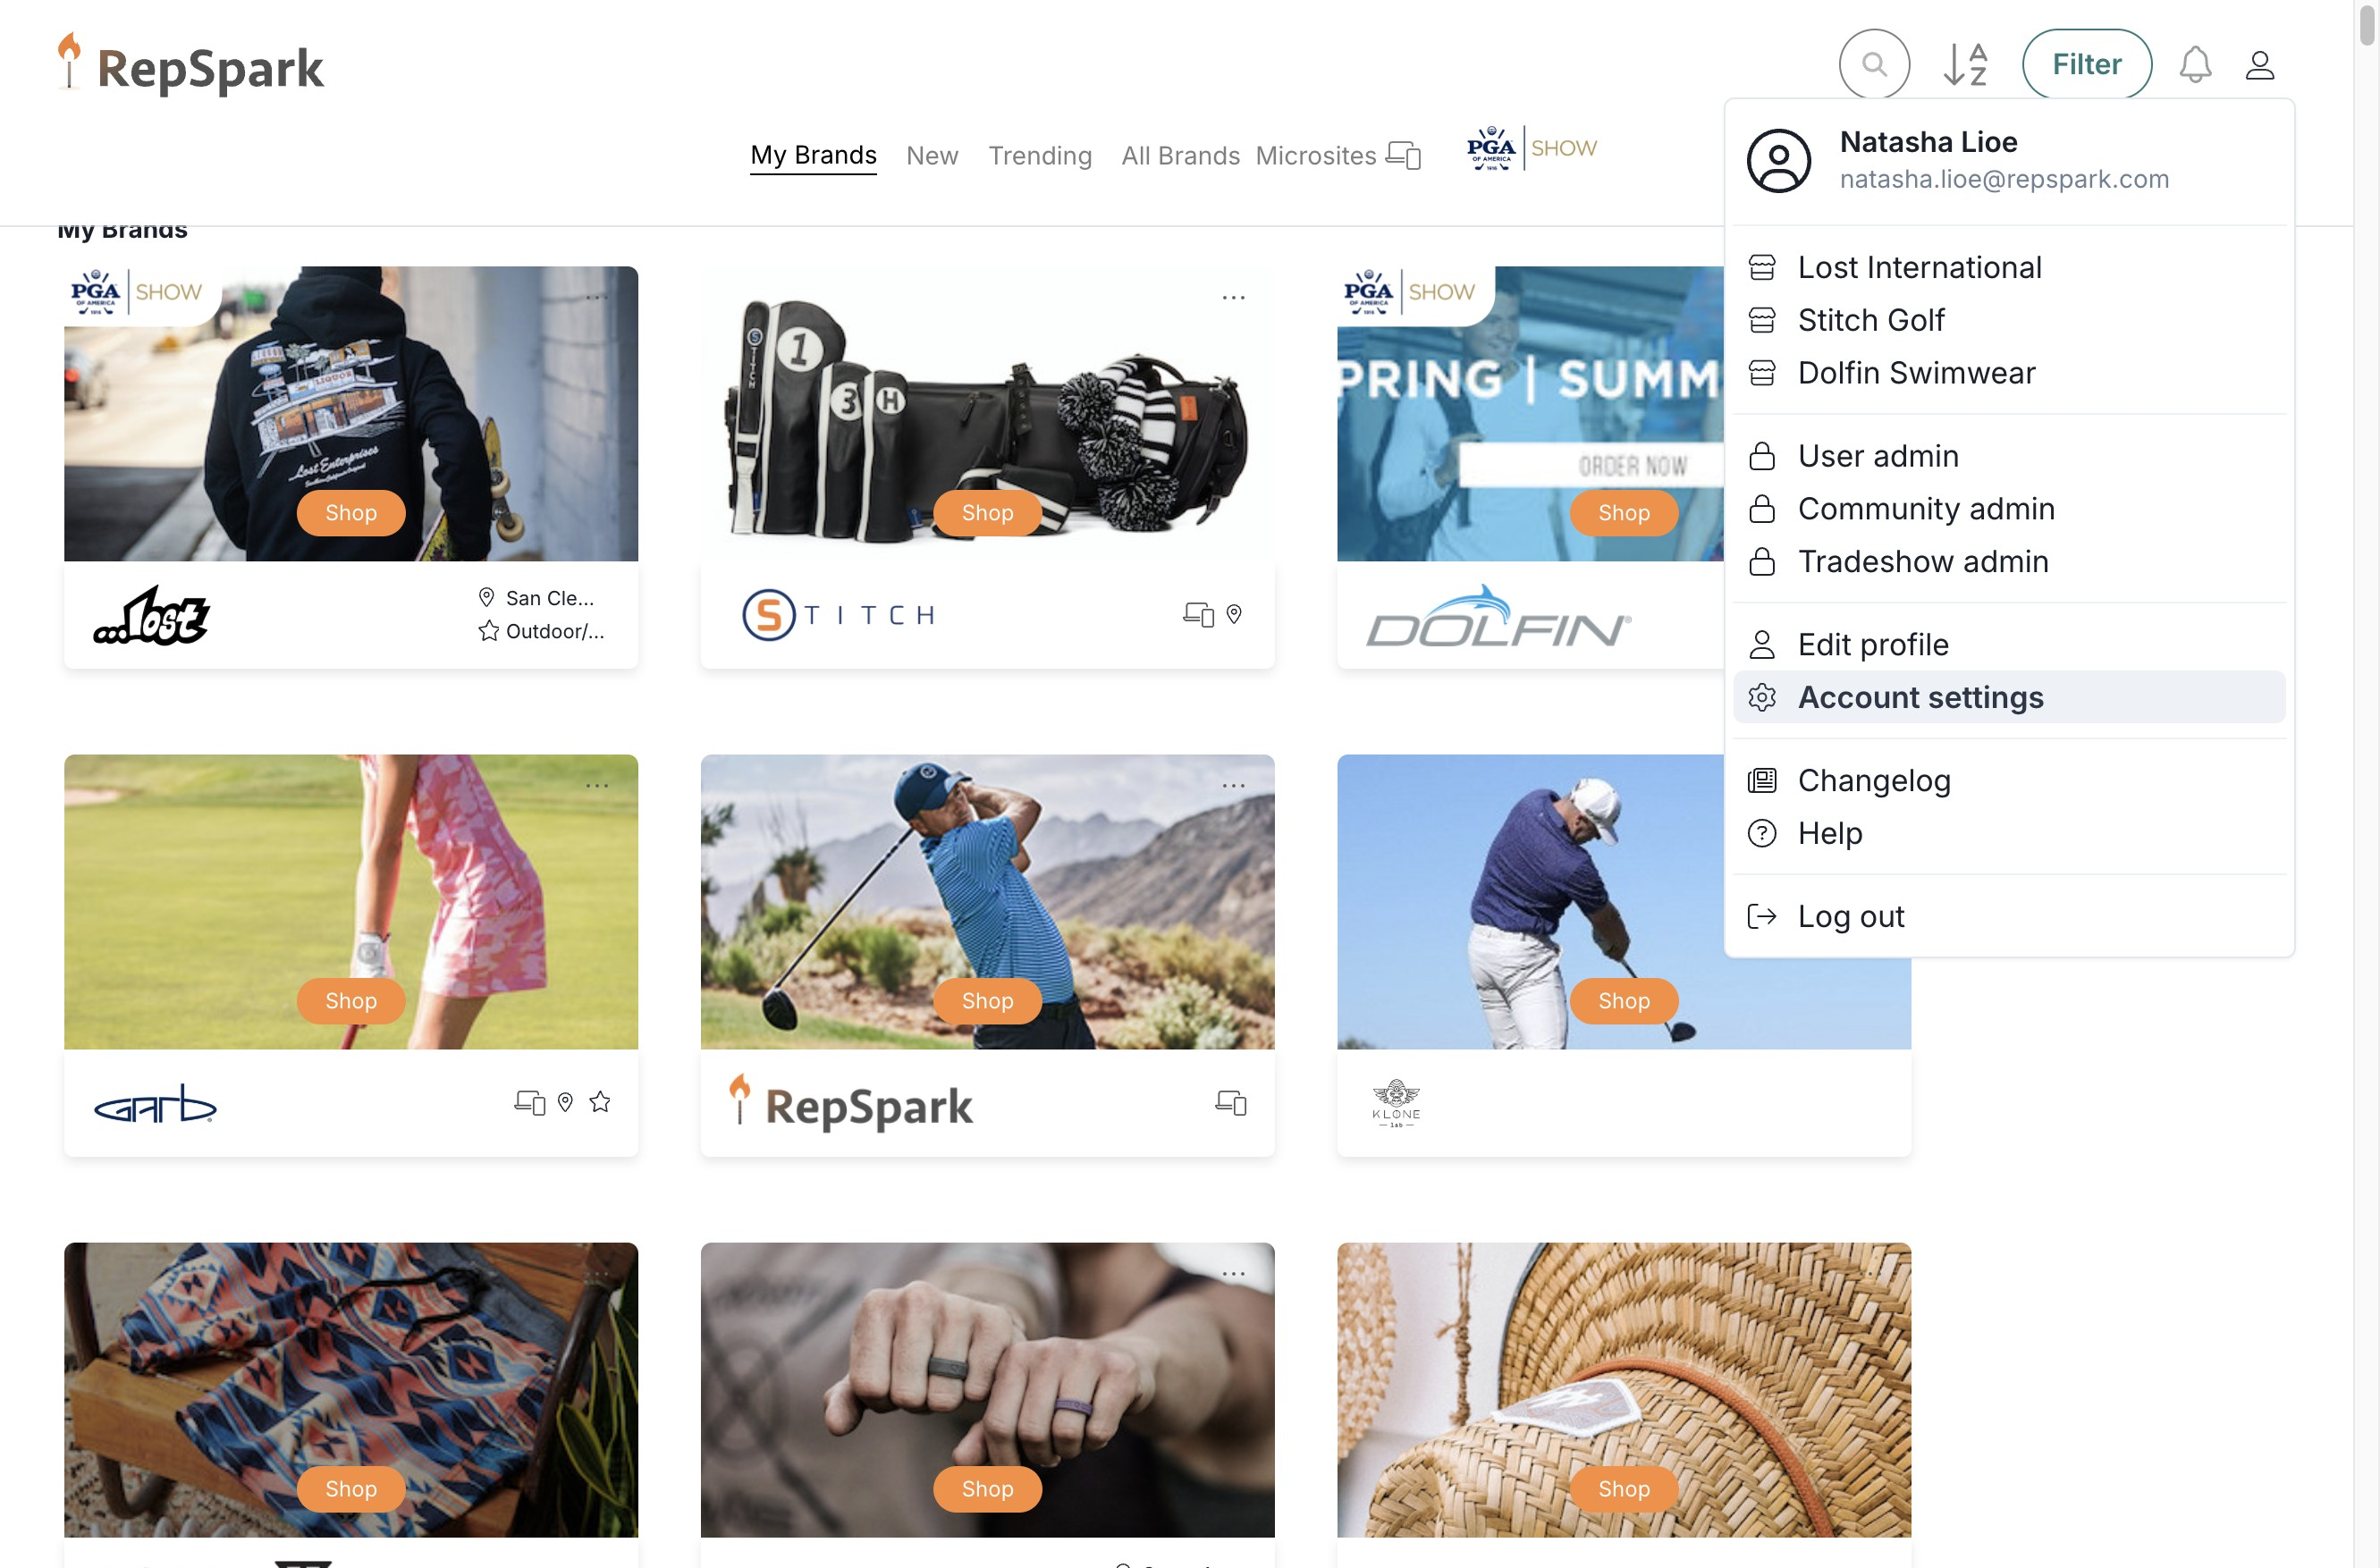
Navigate to the top right profile dropdown to find the Account Settings page. Click the profile icon to open the dropdown modal.
Click "Account settings"
Step 2 - Configure your notification preferences
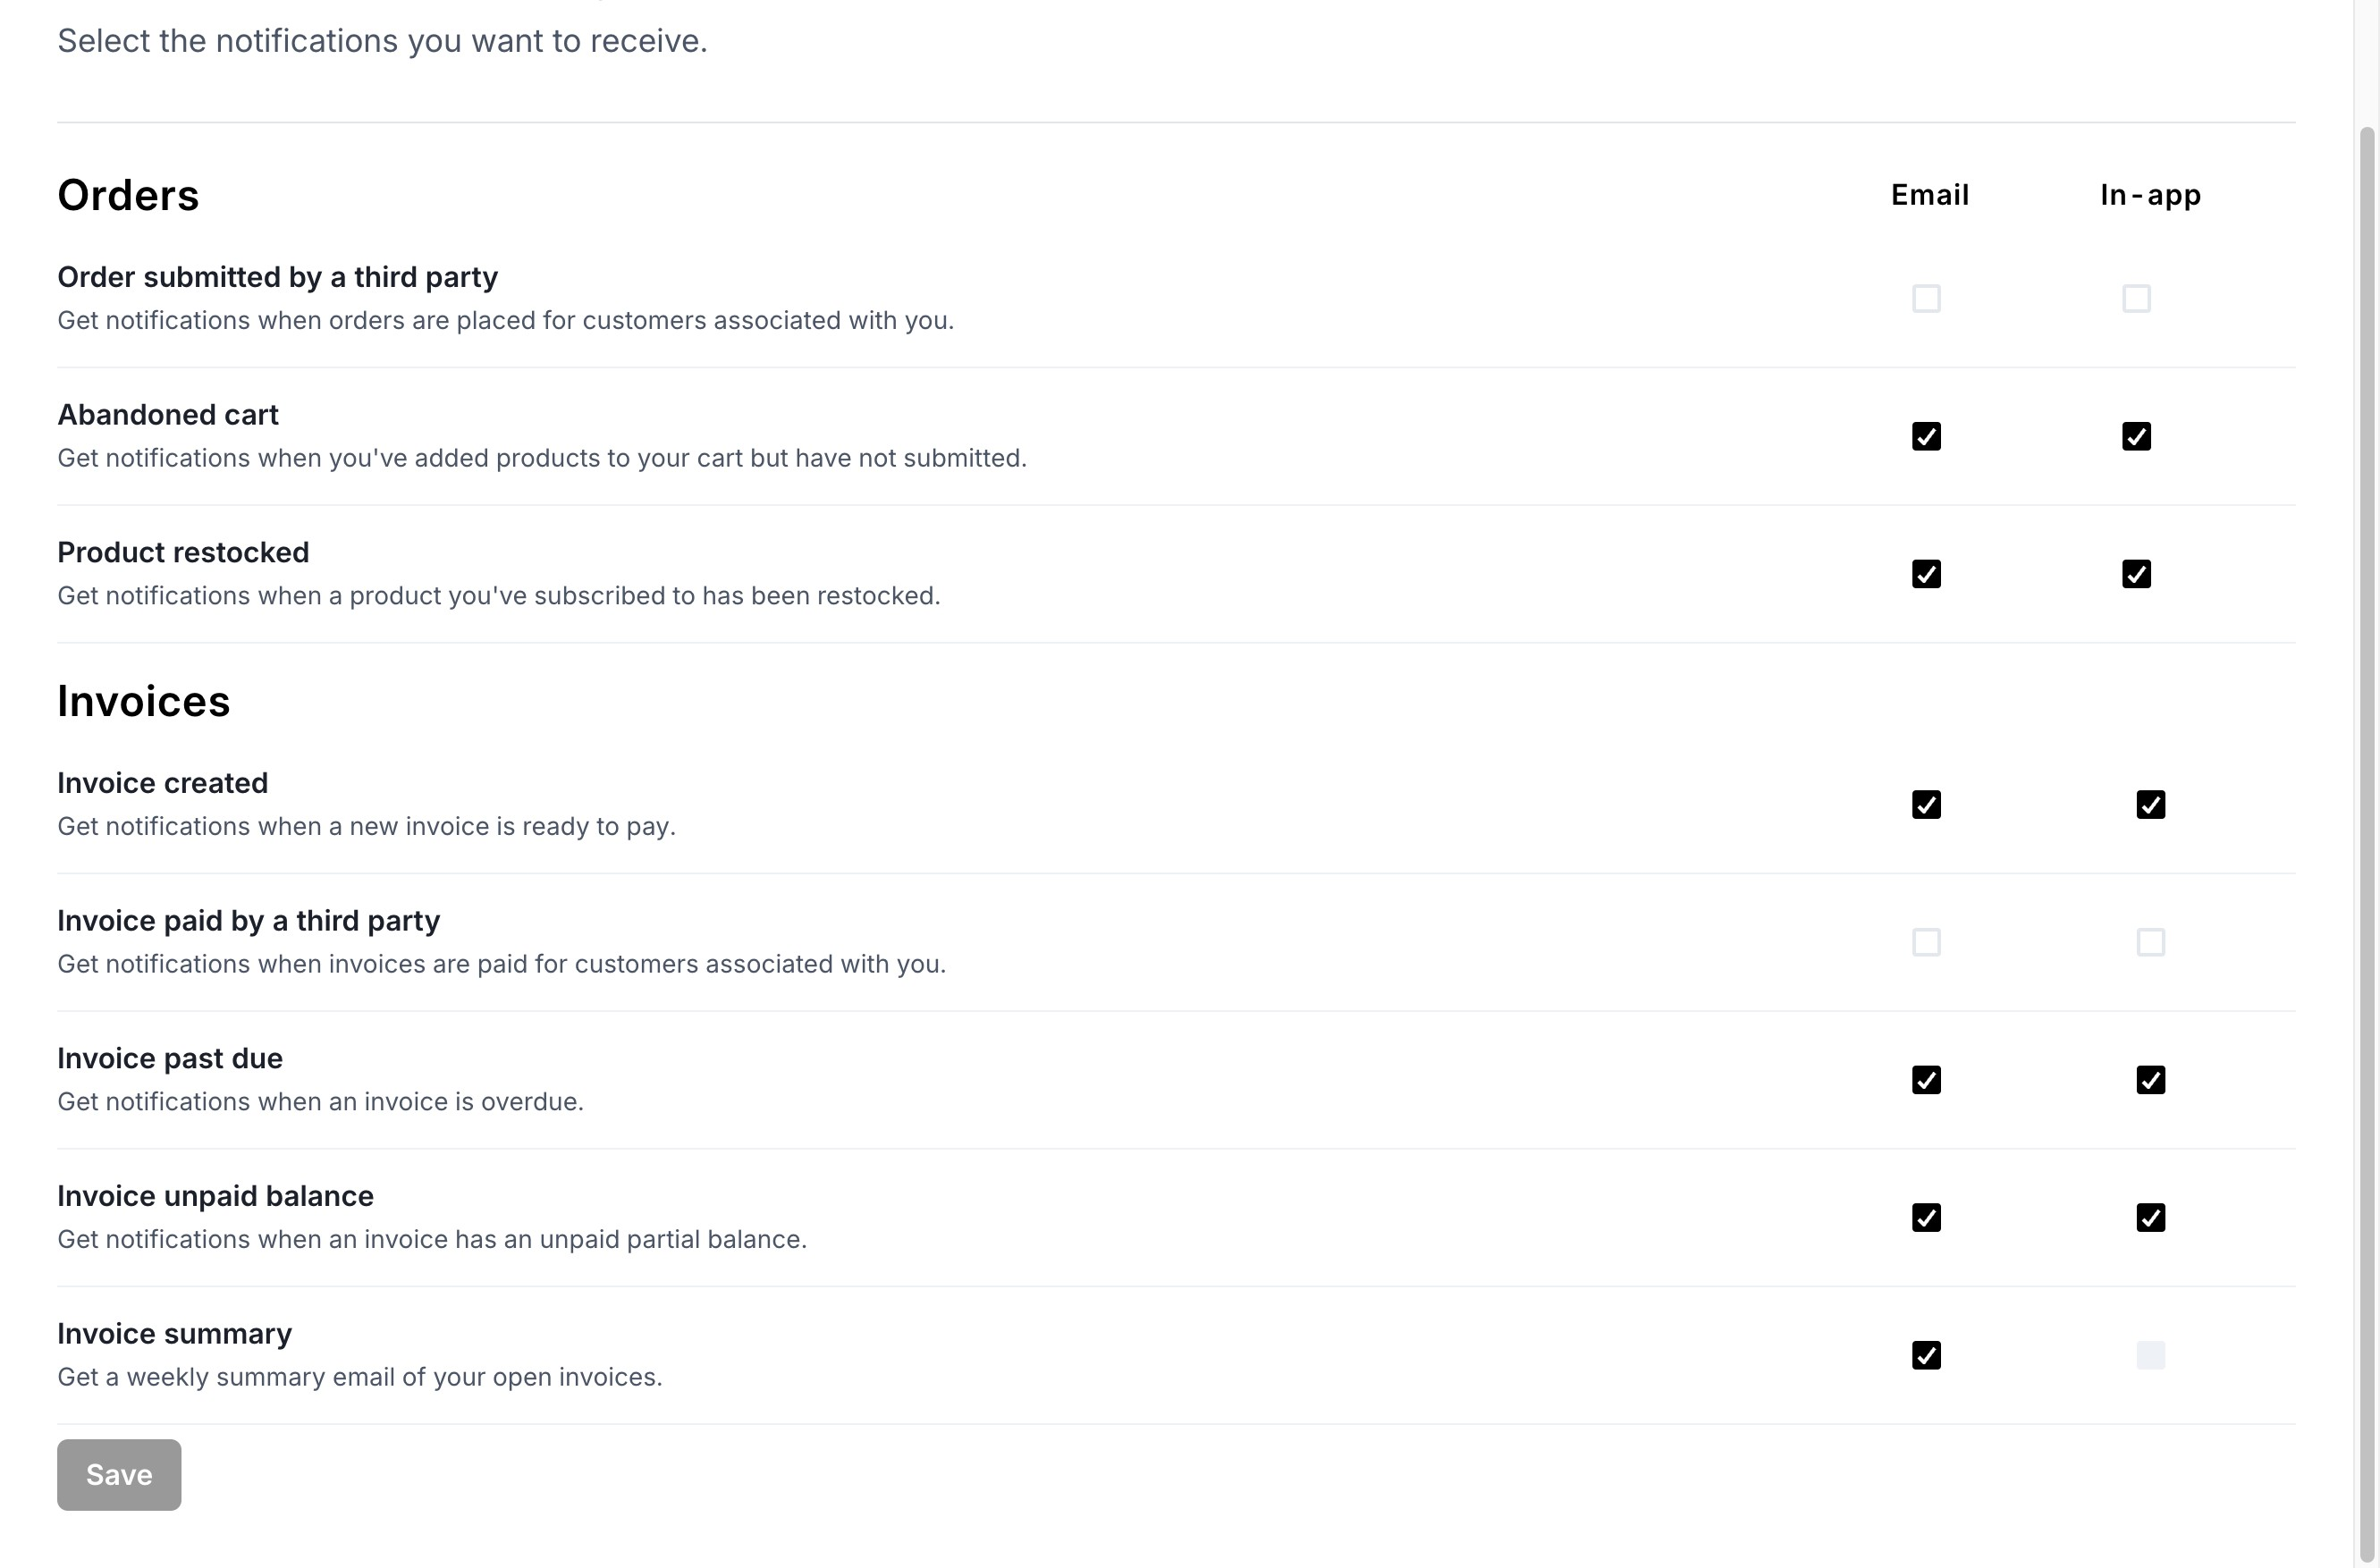
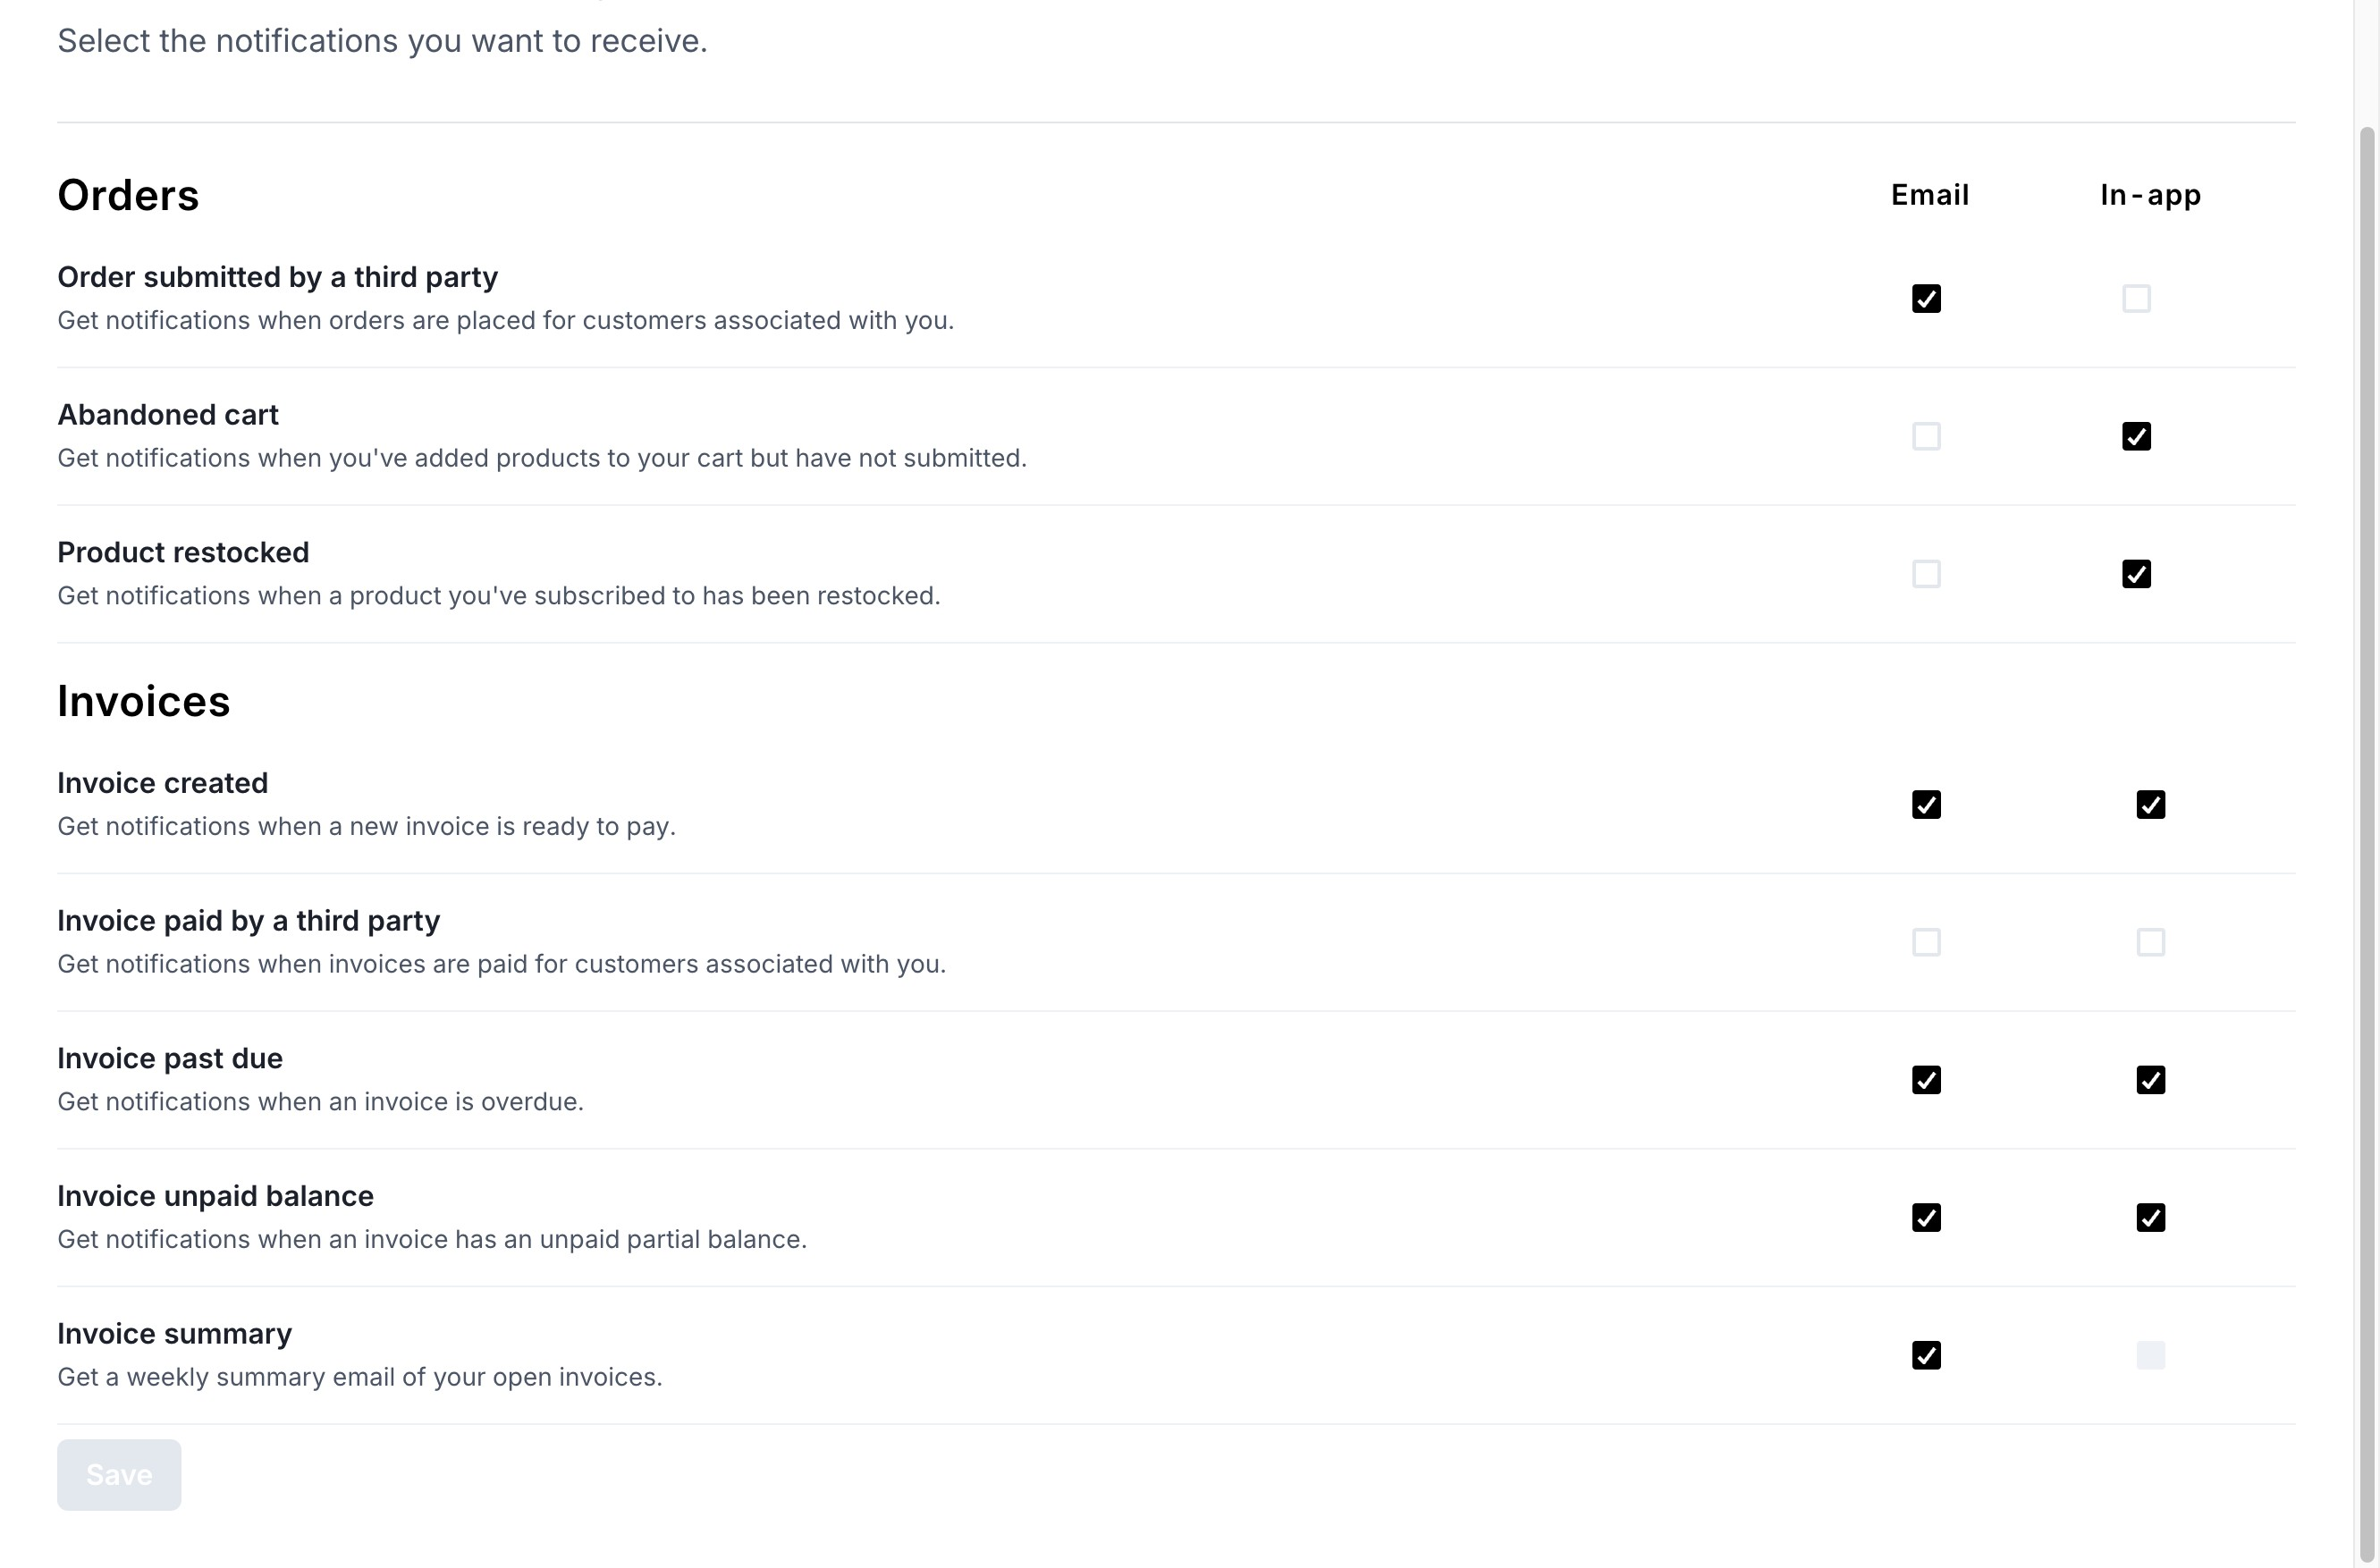
Here's a list of all the notifications that users can customize. You can choose to receive them via email, in an in-app notification, or both. Check the box next to the notification that you want to receive.
Step 3 - Save your preferences
Once you're done updating your preferences, click Save to save all your changes.
And you're done! Now you've configured your user preferences. You can always revisit this page to change your settings.